Cut and prepare the blank, ensuring that it is perfectly square and parallel on all sides. Mark out the centre point of the blank by scribing diagonal lines from opposite corners.

Find a point exactly half way along the top edge of the work and mark a single datum line from the marked centre to this second point, continuing across the top edge of the blank.  Repeat this process on the reverse side of the blank ensuring that the datum lines match and join across the top edge.


Using the Datum line as a point of reference, mark out divisions around the work with a protractor, ensuring that the centre point of the protractor lines up with the centre mark on the blank. For a five sided bowl the divisions will be 72 degrees (5 X 72 =360).

Any number of sides can be included in the Bowl design.  Divide 360 by the number of sides required.

Repeat this process on the reverse of the blank, working anti clockwise


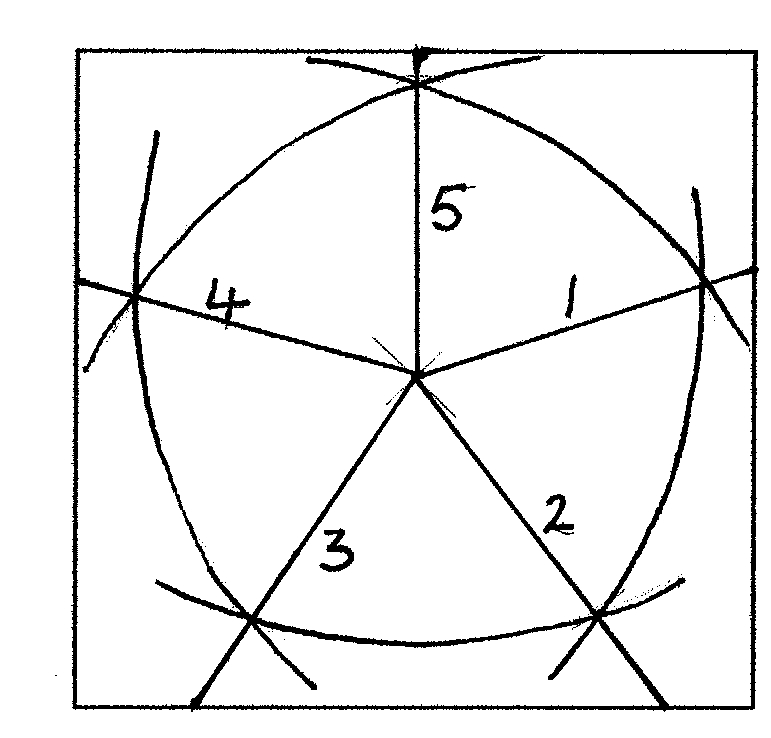
Using a compass on the centre point of the blank, mark a further reference point near to the edge of the blank crossing each of the 72 degree division lines.

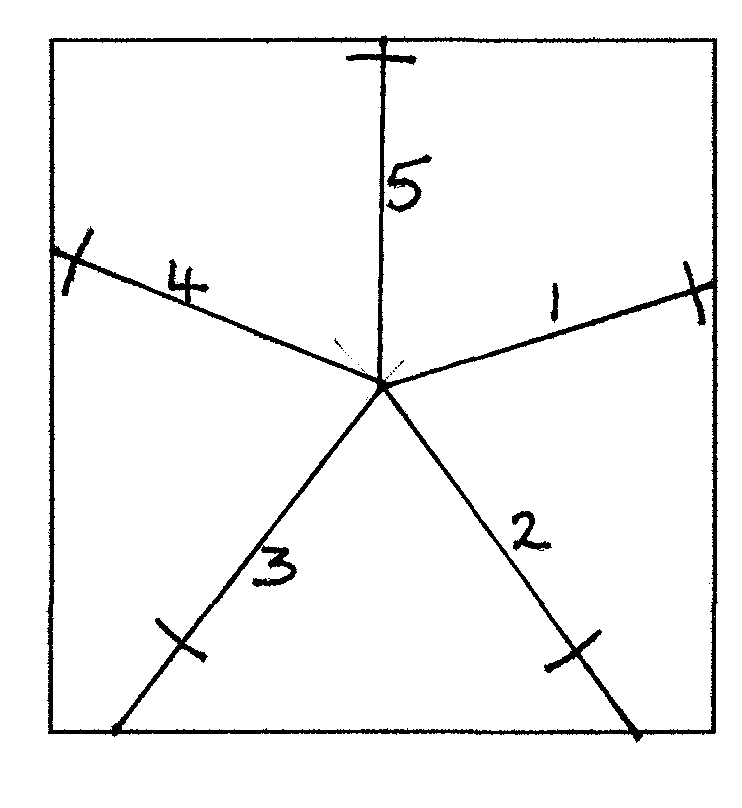
Starting at the first 72 degree line, number each of the division lines 1 to 5, working clockwise around the blank.

Repeat this process on the reverse of the blank, working anti clockwise. The numbers on the obverse and reverse sides should correspond to each other.


Set out the parameters of the Bowl by using a compass. Start with the point of the compass at the reference point on line No.2 (144 degrees). Mark out an arc passing through the reference points on the No.4 line (288 degrees) and the original datum line at No.5 (0/360 degrees)

Working in a clockwise direction mark out all sides of the Bowl, joining Line 5 to Line 1, Line 1 to Line 2 etc.   Repeat this process on the reverse, again working anticlockwise using the numbered lines as a guide.


Either cut the blank to shape on the bandsaw, leaving waste on the outside of the marked areas to turn away cleanly, or mount the complete blank on the lathe between centers and turn away the waste areas. Any drive/tailstock center can be used, one of the safest for this type of work is the Sorby Steb Center.

Mount the blank using the numbered reference points on each side, (No 1 to No 1 etc.) ensure that there is room between both the lathe bed and the toolrest for the blank to swing cleanly and safely as it will be a considerable offset. Use a slow speed that you feel safe and comfortable with.


Use small, light cuts with a sharp tool to reduce the waste and turn to the marked lines. Revolve the blank through each of the numbered reference points until the shape is complete. Leave the sides parallel at this point.

Remount the Bowl centrally on the lathe and turn a small spigot/foot. Reverse, hold in a chuck and turn away the inside of the Bowl. Shape the outside curve of the Bowl. The shaped sides can be placed at any point/height on the bowl.   Be very careful not to turn the design points away.   Sand to completion and finish as desired